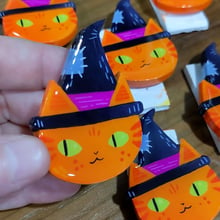
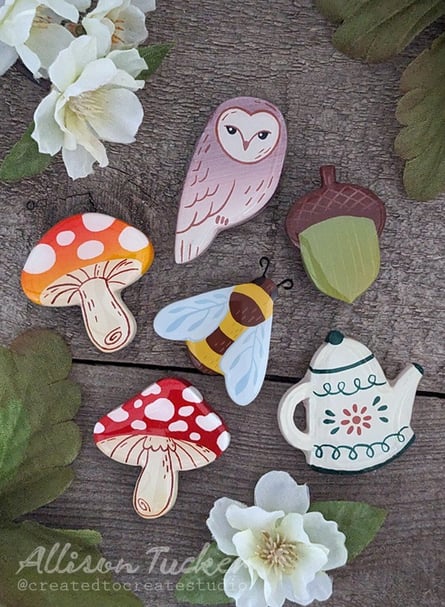
Handmade Clay Pins

polymer clay, acrylic gouache, FW ink and UV resin
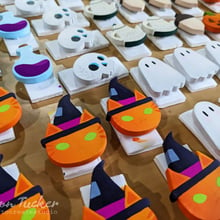
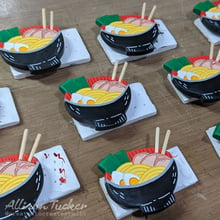
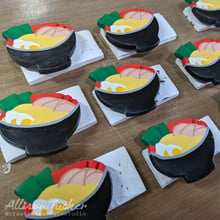
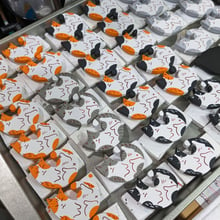
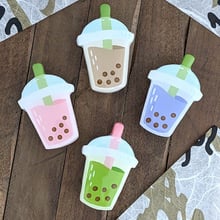
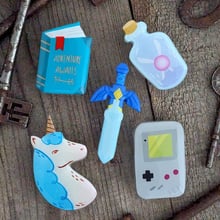
In the winter of 2020, I was inspired to make clay magnets as gifts for friends and family. I took the opportunity to use UV resin for the first time and was thrilled with their finished quality. Fast-forward to June 2021 and my first time I sold my art prints at a local market. Followed by a Christmas market at the St. Joseph Center of AR that same year and their June market of 2022. It was an amazing experience sharing my artwork and seeing people's positive response and enthusiasm for it. I wanted to do more markets, but I'm not the kind of artist that can whip up new art and art prints within a couple of months. At the time, I was very much into enamel pin collecting and I thought about combining that with the magnets I made a few years before. So I made my first batch of handmade clay pins.
The world had grown chaotic in the prior years of the pandemic and I had trouble focusing on art making. Creating these pins gave me something more tangible to focus on beyond drawing and painting. There was something about holding the clay in my hands and transforming it from a lump of nothing into something fun and colorful that filled a little spot in my creative heart. Every step of the process was incredibly cathartic.
Maybe one day I'll make a proper video detailing my pin making process but for now I'll mention the basics for anyone interested.
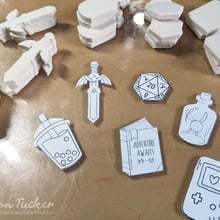
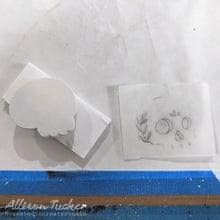
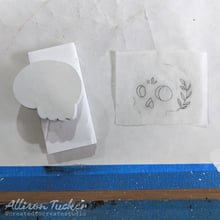
Once I have a design drawn out, I scan and resize it. This way I can print it on a sheet of card stock and use it as a stencil to guide my x-acto knife.
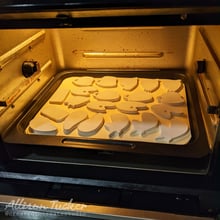
When I roll out the clay I place chopsticks on each side to keep the clay an even thickness, roughly 1/4 inch thick. (Click here to see how I use the same method to make clay Christmas ornaments.)
I lay the paper stencil on the clay and carefully cut around it with my knife, being sure to keep the knife pointed straight up and down as I cut. This prevents slanted sides on the pins.
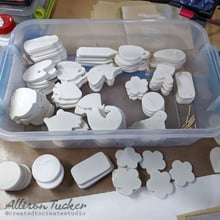
I use polymer clay which needs to be baked. You can use a traditional oven but I actually like using my Instant Pot air fryer because I rarely get brown spots on my clay. I bake my pieces at 265° for 1 hour.
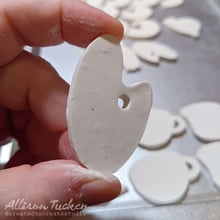
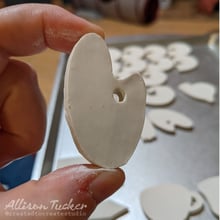
When the clay is cool I will use acetate and q-tips to remove any imperfections from the surface of the clay. Polymer clay becomes a hard plastic once it is baked. By gently rubbing acetate on the surface the plastic will soften, pushing down those annoying bubbles and removing any dust, hair, or fingerprints.
The most exhausting part of the whole process for me is sanding down the sides of each and every pin. Due to some tendon inflammation in my hands and wrists I find it easier to use a mini rotary tool like this one. Sanding creates a lot of dust and that dust is plastic particulate so it is VERY important to do this in a sanding box or outside. And even if you go outside please WEAR A MASK! Plastic does not belong in your lungs and this dust will find its way there.
I wipe any loose dust off the pins and glue the butterfly pin clasps to the back of each pin. Depending on the size and shape of the pins some designs may require two clasps per pin.
I've seen other people recommend using E6000 glue but that stuff did not work for me at all. Good old super glue has given me the best results.Once the glue is dried I will poke the pins into small pieces of scrap foam core board which creates a sturdy base that will keep the pins sitting level and allows me to firmly hold the pins while painting.
How I transfer the design onto each pin.
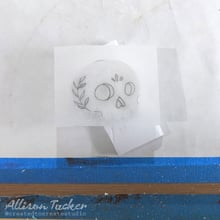
I trace the design from the paper stencils onto a small piece of tracing paper. I draw this with an ink pen to prevent smearing when rubbed.
Then I flip the tracing paper over and trace the flipped image with a pencil.
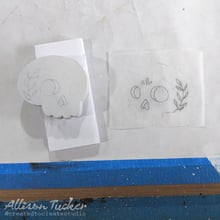
I carefully position the paper right side up onto the face of the pin.
Using my fingernail or a small tool I gently rub over the pencil lines, pressing them onto the surface of the pin. I'll carefully lift up corners of the paper to see if the lines have transferred properly. If I missed a spot I can lay the corner back down and give it some extra rubbing.
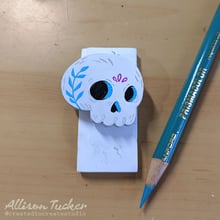
When the tracing paper is removed the line work is visible on the face of the pin
Adding colors and detail.
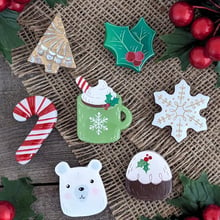
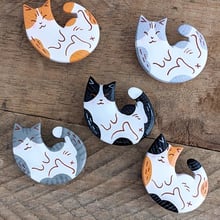
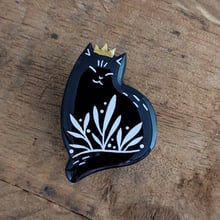
I like to paint my pins with acrylic gouache and FW acrylic ink for details.
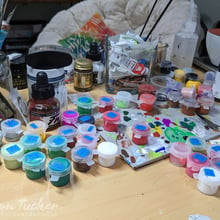
I prefer premixing most of the colors I'll be needing for a batch of pins. I like to use these little containers to mix and store the paint.
Once I have the pins painted I'll add line work and extra details with a fine tipped paint brush, colored pencils or a dip pen.
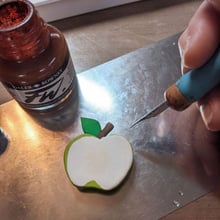
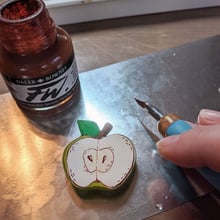
The last step is adding UV resign on the sides, back and front of each pin. This really adds that professional touch that gives the pins extra durability and protection, as well as a beautiful shine.